Hunting season is over and you’re left with pictures from your trip sitting on your camera or computer. What should you do with them?
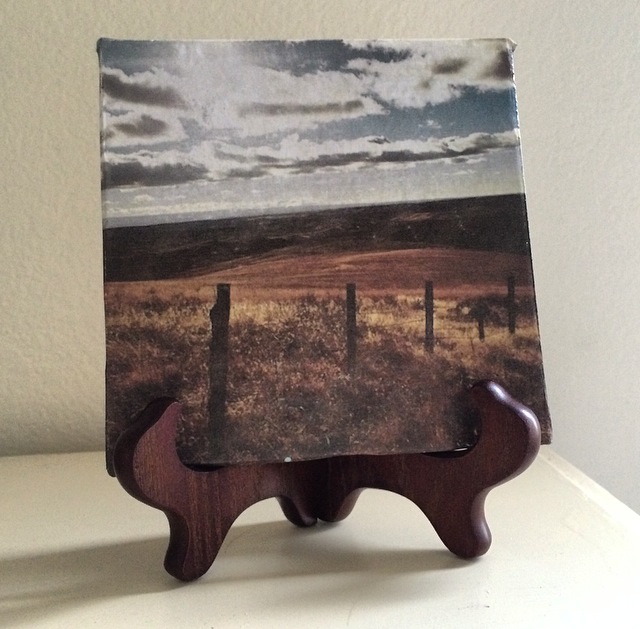
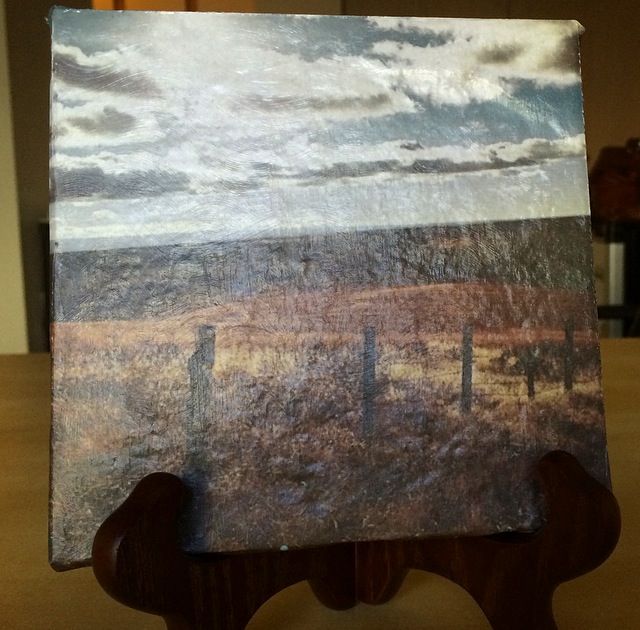
One easy and inexpensive way to display hunting pictures is to make picture tiles like the one below. It makes a perfect gift for Father’s Day. Here’s your reminder it’s in 3.5 weeks!
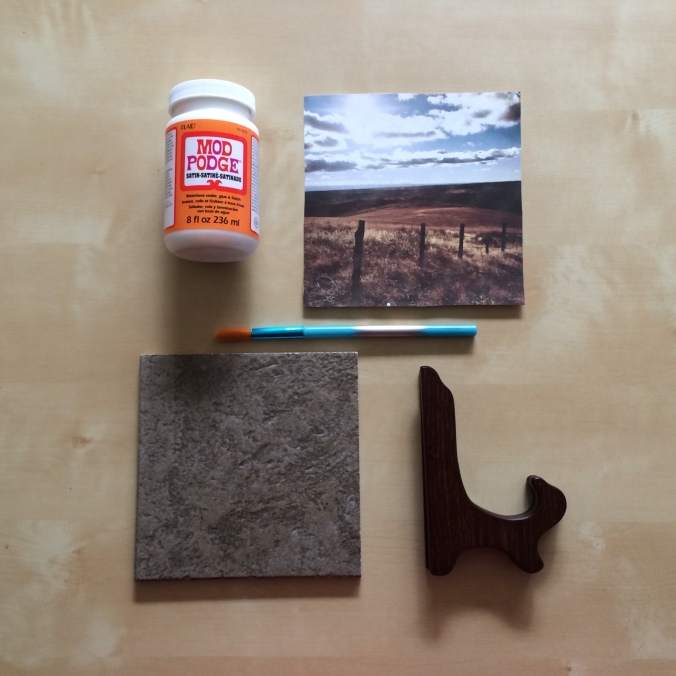
What You’ll Need:– One tile (I used 6 inches x 6 inches)
– Picture printed to tile size on regular printer paper
– Mod Podge (sold at craft stores, as well as Target)
– One brush
– One picture/tile stand
Creating Your Picture Tile
Step 1: Printing the Picture
The first step is to print your picture to match the size tile you bought. Most programs have resizing tools that you can choose the dimensions by inches. When you go to print your picture, be sure to double check the scale is at 100% (some printers will automatically scale it larger). Once your picture is printed, cut it out.
Step 2: Applying picture to tile
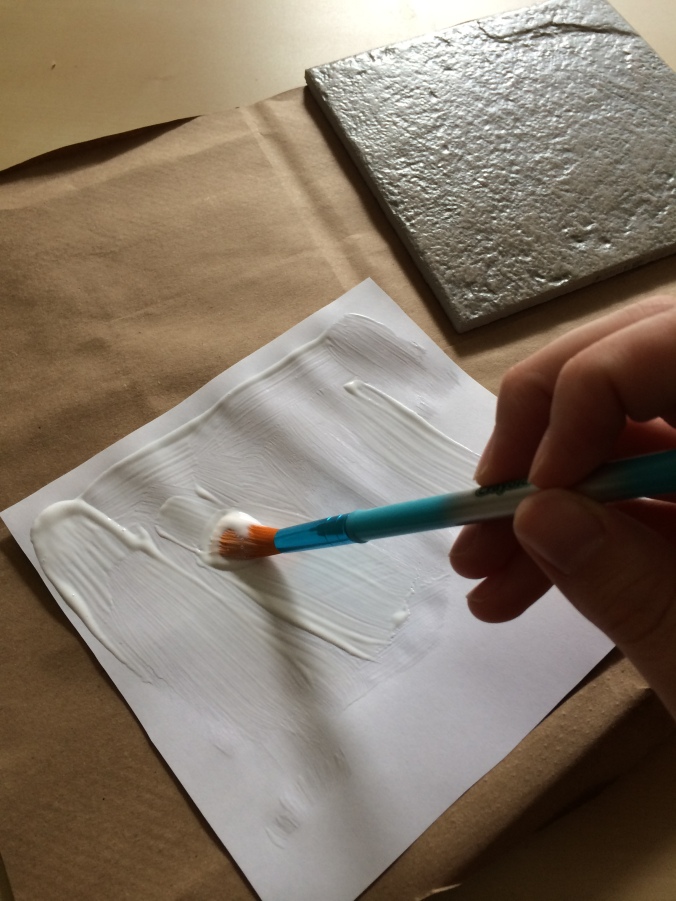
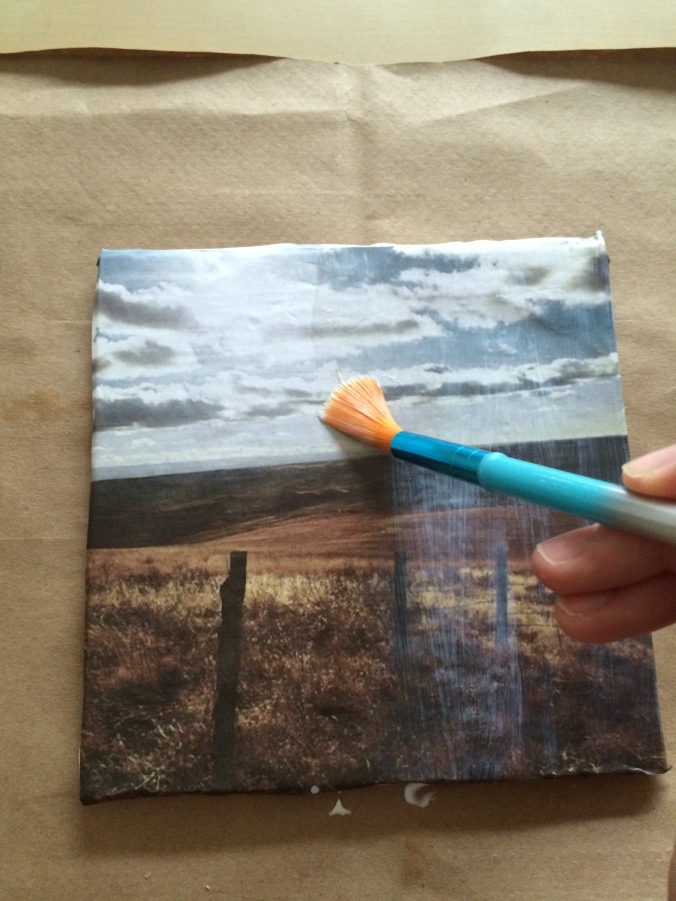
This can get a little messy, so place newspaper or a brown paper bag down so the Mod Podge doesn’t get on your table. To get your picture to stick to the tile, apply a coating of Mod Podge to the back of the picture. Make sure to thoroughly cover the entire backside, including the corners.
Some tiles have bar codes on one side, I always try to remember to make this side the bottom of the tile when applying the picture. You don’t have much time to wait between applying the Mod Podge and placing it on the tile. Square up the top or bottom corners and press down with your hand.
Step 3: Get Rid of Air Bubbles
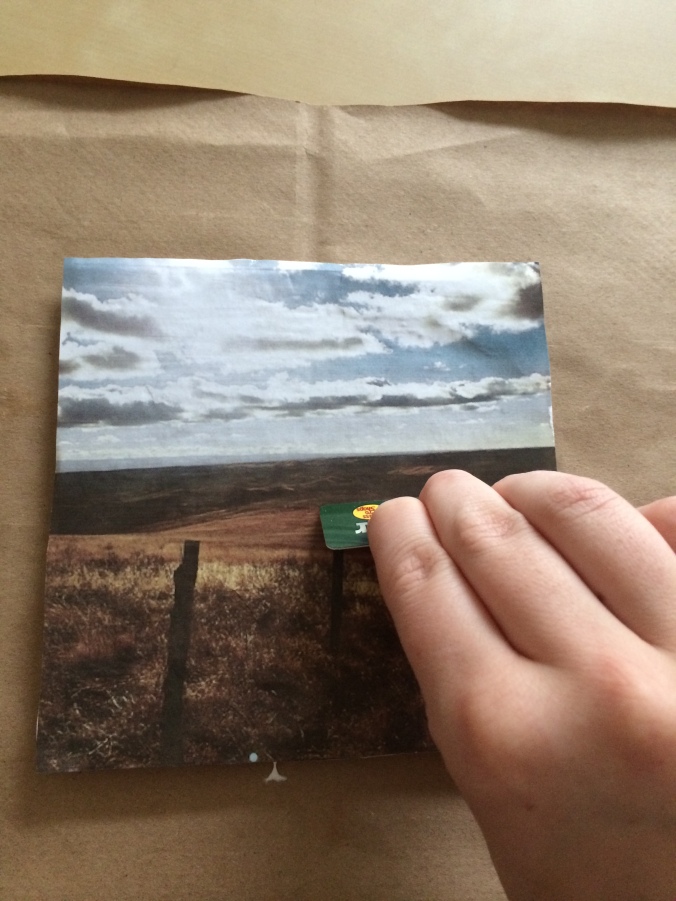
To be sure your picture’s surface is smooth, take an object with a hard, flat edge (I used my Bass Pro Shop rewards card) and slowly press over the tile from one end to the other, removing any air bubbles you can see.
Step 4: Applying the Top Coat
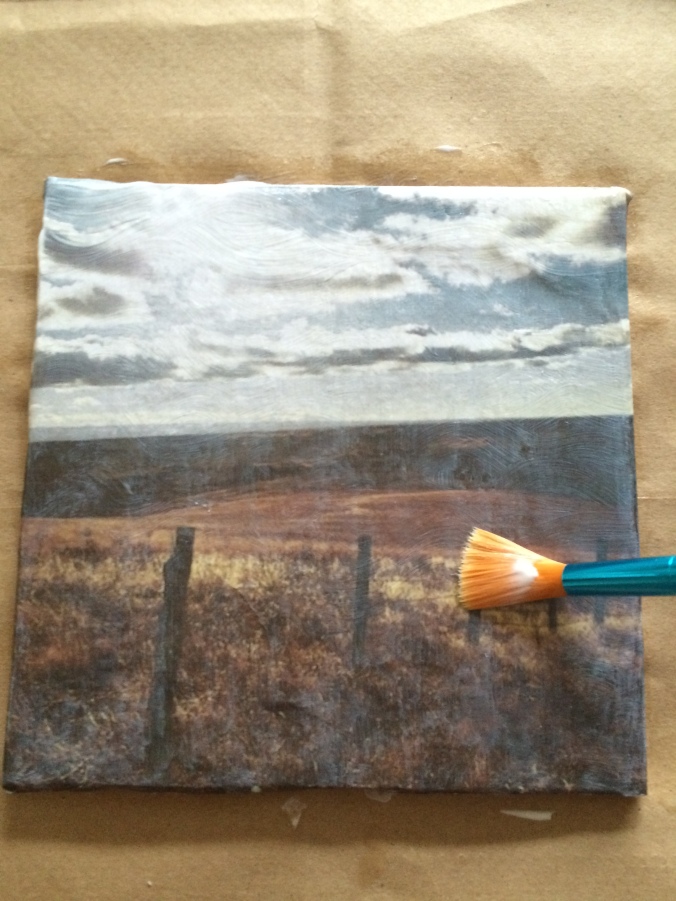
This is the fun step where you coat the front of the picture with Mod Podge to make sure it sticks to the tile and gives a nice, glossy finish. I run into the ink bleeding a little when doing this step, usually it doesn’t matter, but I’ve found applying small amounts of Mod Podge on the brush keeps the ink from bleeding into other colors.
Your brushstrokes will show up once it dries, so feel free to do whatever design you like. I personally like a wavy pattern. You may have extra paper hanging over the edges of the tile. You can either Mod Podge them down flat or you can sand them down to the edges of the tile. I go for the quicker option and just Mod Podge them down.Step 5: Let It Dry
You might be tempted to see what you’ve made right away, but let it dry for a few hours before touching the surface. I’ve definitely made the mistake and touched it too soon which left a fingerprint on the front.
Step 6: Add it to the Tile Holder
Set your tile in whatever holder you’ve decided to buy. I like the look of wood ones, but craft stores also sell metal holders. Display your picture and voilà!
With Father’s Day around the corner, it’s a great gift to make. I have given several as gifts for Christmas and weddings. Most people comment on how professional they look and as you can see, it’s incredibly easy! This took me less than 10 minutes to make.You can buy tiles cheaply from stores like Lowe’s and The Home Depot for less than a dollar for most tiles. I’ve found some on sale for .30 cents. The texture of the tile will show through the paper, the smoother the surface means the smoother your picture will look. Choose whatever tile size you like. For smaller tiles, you could easily attach magnets on the back to hang on your fridge.
These picture tiles are a lot of fun to make. Hopefully I can get my first buck this year to make one featuring that picture!
Do you have any creative ways to share your hunting pictures? I’m always looking for new ways! If you try to make one of these, share your picture in the comments. I’d love to see what people make!

That’s awesome!
Thanks! It almost feels like cheating with how easy they are to make. I’d love to see if you make any!
Neat Idea!